Our Home Remodel Project

The original house was built in 1924. The chimney and small windows beside it show that there was no view to exploit from the main living room at that time. The large window is the original dining room. The window to it's right is the former kitchen. The roof line you see to the right was an after thought. A not so good handyman's construction was very poorly done. The 600 sq ft basement runs from the shadows edge by the chimney over to the white downspout. The rear chimney ran up through the old kitchen servicing the basement furnace and a stove in the kitchen.
I have been blessed by the volunteerism of several Vietnam veterans who attend our "Point Man Ministry" outreach. I cannot say enough about them. "Skinny Dennis", "Hank", "Tom", "Larry M", "Skip", "Big Larry" and others assisted with the heavy projects like concrete, roof tear off, raising walls, hanging ceiling sheetrock, etc. I'd just let them know and they'd make time.
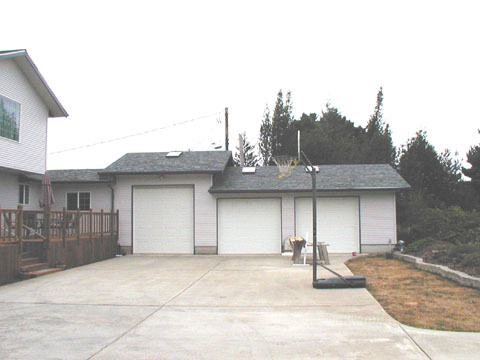
The first project was to close in the old driveway and construct a new one. The steep driveway entering the 24' x 40' garage via a 16' garage door was not practical. My spine cannot handle concrete work so Skinny Dennis bid the excavation and concrete. To this day I still cannot fathom that we removed (55) 5 cubit yard dump truck loads of dirt off the double city lot. This doesn't include the dirt we used to fill the old driveway and add a "Berm" on the view side of the property. It took around 100 cubic yards of concrete to lay down the pad and driveway retaining walls.


Tom on the Cat New Driveway Construction
While Dennis was working on the pad and driveway I began building the foundation forms to tie the old house into the garage. Tom gave me a hand with some of the construction as well as the concrete pour. The purpose of this addition was: 1) Block off the Northwest wind that howled between the house and garage 2) Create an RV port in the garage by raising a 16' section 3' so the house roofline could be tied in. 3) Create a new Full Bath for the North Bedroom 4) Create a Pantry to facilitate the new kitchen 5) Create a Utility Room 6) Cause the Home and Garage to flow together as one unit.
The upstairs Master Bedroom addition required that I tear off a major portion of the existing roof in order to construct it. Hank and Larry M were instrumental in this phase. I would eventually remove the entire roof structure and replace it with manufactured trusses. This allowed me to vault the living room ceiling for a more spacious look. I also insulted the entire ceiling system to the building code.


Slab & Foundation Foundation


Framing Master Bedroom
I utilized an existing oversized downstairs closet for my stair run up to the Master Bedroom. The ceilings are vaulted and I installed a large walk-in closet to compliment the full bathroom. A skylite amplifies the lighting in the Master Bath.
Hank was my electrical professional. He tutored me and assisted with the new wiring. We also rewired the entire home as it had the old "knob and tube" wiring. I tore out all of the old "lathe and plaster" walls and replaced them with sheetrock.
~ Are you ready for More Current Views?! ~


The 800 sq ft deck is close to the concrete pad in order to cause the entire project to flow together. I've covered all exposed wood facia, barge rafters, etc. with heavy gauge gutter metal so there will be no more painting. Then I applied "Platinum Gray" vinyl soffit and siding to the entire outside of the home.

We have installed a "Vermont Castings" propane heater in the living room. It gives immediate heat in that space and we can also turn on the central heating system fan to circulate the propane heat throughout the house. We also had a "Trane" heat pump installed for greater efficiency and are very happy with it.
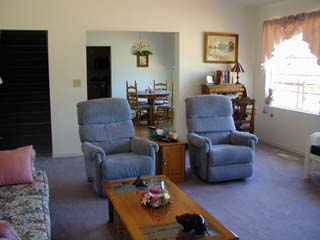
~ Some shots of the Interior ~


~ Some Photos of the View ~


Hope you Enjoyed Our Remodel Page
~~~~~~~~~~~~~~~~~~~